
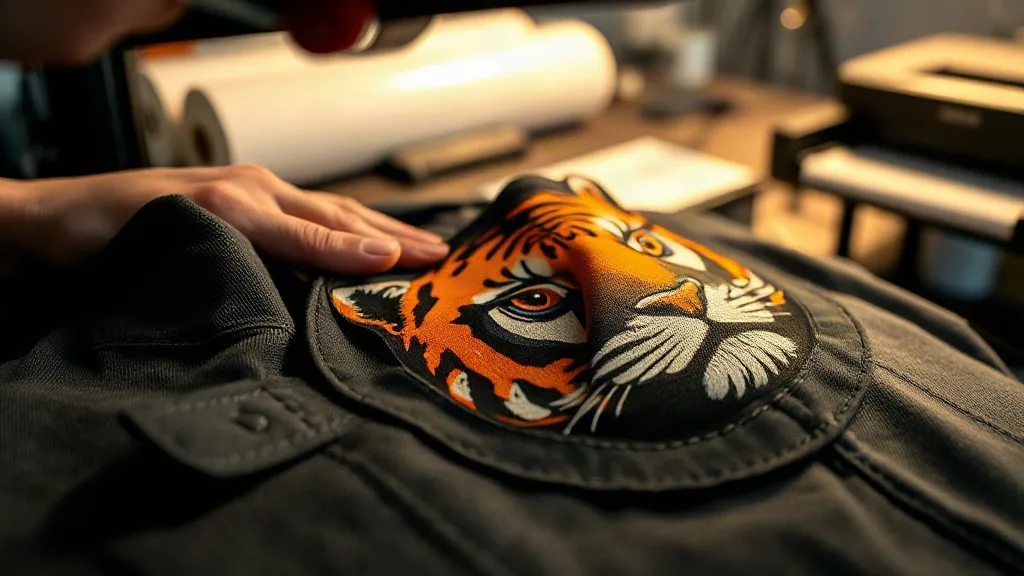
Custom patches have long been a staple in apparel decoration, adding a premium touch to jackets, hats, bags, and uniforms. Traditionally, embroidered or woven patches dominated the market, but they come with limitations in color complexity and fine detail. Enter dtf transfers, a digital printing technology that is changing how decorators approach patches. In this guide, we'll explore how dtf can be used to create stunning custom patches that are durable, vibrant, and easy to apply.
Why DTF Transfers Are Ideal for Custom Patches
DTF, or direct-to-film, printing involves printing designs onto a special film, applying a powder adhesive, and then heat-pressing the film onto fabric. The result is a soft, flexible, and highly durable print that bonds to the fabric fibers. For patches, this means you can achieve photographic-quality images with gradients, fine lines, and unlimited colors, all without the constraints of thread colors or weave limitations.
Unlike traditional patches that require stitching or iron-on backing, DTF patches can be applied directly to the garment, eliminating the need for separate patch production and attachment. This streamlines the workflow and reduces costs, especially for small batches or one-off designs.
Unmatched Design Freedom
With DTF, you're not limited to a set number of thread colors or simple shapes. You can print complex artwork, including small text, detailed logos, and photorealistic images. This opens up new possibilities for patch designs, from intricate mascots to gradient backgrounds.
Durability That Withstands Wear
DTF transfers are known for their excellent wash resistance and stretchability. When properly applied, they adhere strongly to the fabric and can withstand repeated washing without cracking or fading. This makes them suitable for workwear, sportswear, and any application where longevity is key.
Choosing the Right Fabric for DTF Patches
DTF transfers work on a wide range of fabrics, but some perform better than others. Cotton, polyester, and blends are all suitable, but the surface texture and color can affect the final result. For patches, you'll want a fabric that provides a good base for the adhesive to bond.
Best Fabrics for DTF Patches
- Cotton and cotton blends: Natural fibers bond well with DTF adhesives, resulting in a soft hand and strong hold.
- Polyester: Works well, but lower temperatures may be needed to avoid dye migration.
- Canvas and twill: These sturdy fabrics are perfect for patches on bags, jackets, and hats.
Fabrics to Avoid
Fabrics with heavy coatings, such as water-repellent finishes, can prevent proper adhesion. Also, very stretchy fabrics like spandex may cause the patch to distort unless a stretchable DTF film is used.
Step-by-Step Guide to Applying DTF Patches
Applying a DTF patch is similar to applying a regular DTF transfer, but with a few nuances. Here's a practical walkthrough.
1. Prepare Your Design and Film
Design your patch artwork with the final size in mind. Print it onto DTF film using a DTF printer, then apply the adhesive powder and cure it. If you're ordering pre-made transfers, ensure the design is mirrored if necessary (though DTF films are usually printed right-reading).
2. Set Up Your Heat Press
Preheat your heat press to the recommended temperature for your fabric (typically 300-325°F / 150-160°C). Use a PTFE sheet or parchment paper to protect the press and the transfer.
3. Position the Patch
Place the DTF film onto the garment with the design facing up. If you're creating a patch that will be cut out, you can either cut the film to the desired shape before pressing or press the whole design and then trim around it. For a cleaner edge, trimming before pressing is often better.
4. Press the Patch
Apply medium pressure for 10-15 seconds. The exact time and temperature depend on your press and fabric, so always do a test press. Peel the film hot or cold according to the film's instructions. Most DTF films are hot-peel, but some require cooling.
5. Post-Press for Durability
For added durability, especially on edges, you can cover the patch with a Teflon sheet and press again for 5-10 seconds. This helps the adhesive fully penetrate the fabric.
Design Tips for Standout DTF Patches
Creating a patch that looks professional requires attention to detail. Here are some design considerations.
Keep It Simple and Bold
Patches are often small, so intricate details may get lost. Use bold shapes, high contrast, and clear typography. A patch with a simple, iconic logo often reads better than a complex illustration.
Consider the Edge
DTF patches have a printed edge, which can be left as is or bordered with a stitched outline for a more traditional look. If you want a stitched border, design your artwork with a margin and then sew around the pressed patch.
Test on Scrap Fabric
Always do a test press on the actual fabric you'll be using. This helps you dial in the temperature, pressure, and time, and ensures the colors look as expected.
Common Challenges and How to Overcome Them
Even with a reliable process, issues can arise. Here are some common problems and solutions.
Patch Peeling at the Edges
This often happens if the edges weren't pressed evenly. Use a smaller press or apply more pressure on the edges. Trimming the film close to the design can also help.
Color Fading After Wash
Ensure you're using high-quality DTF film and powder, and follow the correct washing instructions (inside out, cold water, no bleach). Proper curing during the printing process is also critical.
Stiff Hand Feel
DTF patches can feel a bit stiff, especially on lightweight fabrics. Using a thinner film or reducing the amount of powder can help. Also, pressing at a slightly lower temperature for a longer time can improve flexibility.
Finding DTF Transfers Near Me for Custom Patches
If you're not ready to invest in a DTF printer, you can order custom DTF transfers from specialized suppliers. When searching for dtf transfers near me, look for providers that offer gang sheet options and fast turnaround. Many suppliers can print your patch designs on a gang sheet, allowing you to mix multiple designs in one order and save on costs.
Frequently Asked Questions
Can DTF transfers be used to make patches for hats?
Yes, DTF transfers work well on hats, including caps and beanies. However, the curved surface requires a hat press or a smaller platen to ensure even pressure. Pre-pressing the hat to flatten the area can also help.
How do I wash garments with DTF patches?
Turn the garment inside out and machine wash cold. Avoid using fabric softener or bleach. Tumble dry on low or hang dry. Following these care instructions will extend the life of the patch.
Can I layer DTF patches with other decorations?
Absolutely. DTF patches can be combined with embroidery, screen printing, or other DTF transfers. Just be mindful of the order of application and ensure each layer is properly cured before adding the next.
What is the minimum order quantity for custom DTF patches?
With DTF, there is no minimum. You can order a single patch or thousands. This makes it ideal for sampling, small businesses, and personalized items.
Are DTF patches as durable as embroidered patches?
When applied correctly, DTF patches are highly durable and can withstand repeated washing. While they may not have the same raised texture as embroidery, they offer superior detail and color vibrancy. For many applications, they are a preferred choice.