
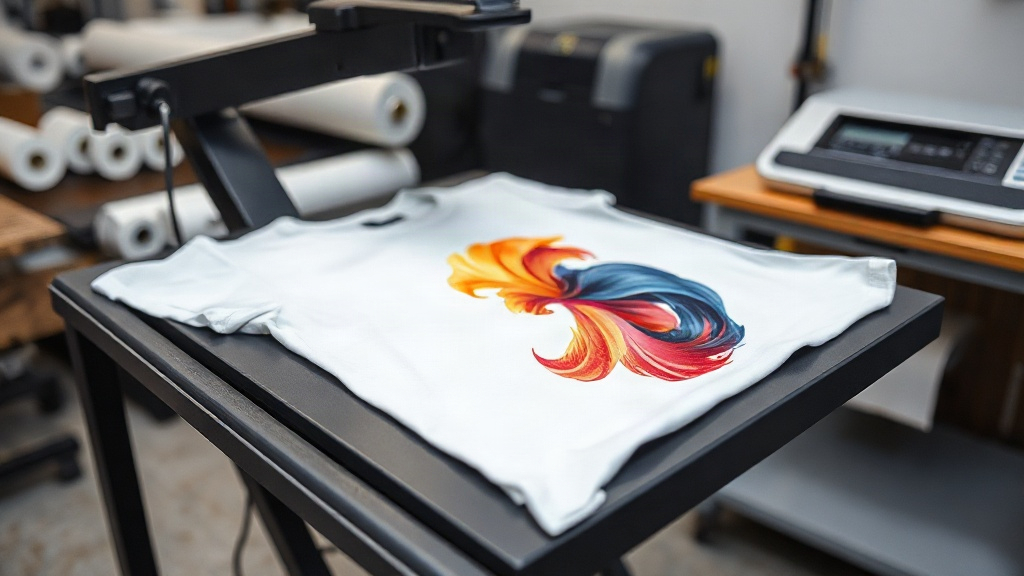
If you've been exploring custom apparel printing, you've likely encountered DTF transfers. This innovative technology is rapidly becoming a favorite among hobbyists and professionals alike, offering vibrant colors and exceptional durability on a wide range of fabrics. Unlike traditional methods that require specific materials or extensive setup, DTF transfers simplify the process while delivering professional-quality results. In this guide, we'll walk you through everything you need to know about DTF transfers, from the basics to advanced tips, so you can start creating stunning custom garments right away.
What Are DTF Transfers?
DTF stands for Direct to Film. It's a printing method where your design is printed onto a special PET film using water-based inks, then coated with a thermoplastic adhesive powder. The film is then cured and can be stored until you're ready to apply it to a garment. When you're ready, you simply heat press the transfer onto the fabric, and the adhesive melts, bonding the ink to the material. The result is a soft, stretchable print that holds up wash after wash.
What sets DTF apart is its versatility. You can print on cotton, polyester, blends, and even some synthetic fabrics that are tricky for other methods. Plus, DTF transfers don't require weeding or masking, saving you hours of tedious work. Whether you're printing a single custom t-shirt or a bulk order, DTF offers a streamlined workflow.
Why Choose DTF Transfers Over Other Printing Methods?
If you're comparing printing options, here's why DTF transfers stand out:
- No color limitations: DTF can reproduce full-color images, gradients, and fine details with ease, unlike vinyl cutting which is limited to solid colors.
- Works on multiple fabrics: From 100% cotton to 50/50 blends and even nylon, DTF adheres well without pre-treatment.
- Durability: When applied correctly, DTF prints resist cracking, peeling, and fading, even after repeated washing.
- Cost-effective for small batches: No minimum order quantities, and you can print as many or as few as you need.
- Soft feel: Unlike some heat transfers that have a thick plastic feel, DTF prints are thin and flexible, moving with the fabric.
These advantages make DTF transfers an excellent choice for custom t-shirts, tote bags, hoodies, and more. Whether you're a small business owner or a DIY enthusiast, DTF can elevate your creations.
How to Apply DTF Transfers: Step-by-Step
Applying DTF transfers is straightforward, but following the right steps ensures a long-lasting result. Here's a detailed guide:
1. Prepare Your Workspace and Materials
You'll need a heat press (or a home iron as a backup, though a heat press is recommended for consistent pressure and temperature), your DTF transfer, and the garment. Ensure the garment is clean, dry, and free of wrinkles. Pre-press the garment for a few seconds to remove moisture and wrinkles, which helps the transfer adhere evenly.
2. Set the Heat Press Parameters
Temperature and time are critical. For most DTF transfers, set your heat press to 300-325°F (150-160°C) with medium to firm pressure. The exact settings can vary by transfer manufacturer, so always check the instructions. A typical press time is 10-15 seconds.
3. Position the Transfer
Place the DTF transfer on the garment with the printed side facing up. If your transfer has a clear backing film, the design should be against the fabric. Use heat-resistant tape to hold it in place if needed.
4. Press the Transfer
Close the heat press and apply pressure for the recommended time. Avoid moving the transfer during pressing. Once done, open the press and allow the garment to cool for a few seconds.
5. Peel the Film
DTF transfers are typically cold peel or warm peel. For cold peel, wait until the transfer is completely cool before peeling off the film. For warm peel, wait about 10-15 seconds. Peel slowly and at a low angle to prevent the design from lifting.
6. Post-Press for Durability
For extra durability, cover the printed area with a Teflon sheet or parchment paper and press again for 5-10 seconds. This helps the adhesive fully cure and ensures the print withstands washing.
Common Mistakes to Avoid with DTF Transfers
Even with a simple process, a few missteps can ruin your transfer. Watch out for these:
- Insufficient pressure: Without enough pressure, the adhesive won't bond properly, leading to peeling. Adjust your press and ensure even pressure across the platen.
- Wrong temperature: Too low and the adhesive won't melt; too high and you can scorch the fabric or the film. Use an infrared thermometer to verify your press temperature.
- Peeling too soon or too late: Follow the recommended peel type. Peeling a cold-peel transfer while hot can cause the design to stretch or tear.
- Not pre-pressing: Moisture in the fabric can create steam pockets, preventing proper adhesion. Always pre-press.
- Using the wrong fabric: While DTF works on many fabrics, some highly textured or coated materials may not bond well. Test on a scrap first.
By avoiding these pitfalls, you'll achieve consistent, professional results.
DTF Transfers vs. Other Printing Methods: A Quick Comparison
Let's see how DTF stacks up against common alternatives:
- DTF vs. DTG (Direct to Garment): DTG requires pre-treatment and works best on 100% cotton. DTF works on more fabrics and often has brighter colors.
- DTF vs. Vinyl: Vinyl is limited to one color per layer and requires weeding. DTF handles complex designs with no weeding.
- DTF vs. Screen Printing: Screen printing is cost-effective for large orders but has setup costs and is impractical for small batches. DTF has no minimums and is ideal for short runs.
- DTF vs. Sublimation: Sublimation only works on polyester or specially coated surfaces. DTF adheres to cotton and blends.
Each method has its place, but DTF transfers offer a unique blend of versatility, durability, and ease of use.
Tips for Storing and Handling DTF Transfers
If you're not using your DTF transfers immediately, proper storage is key. Keep them in a cool, dry place away from direct sunlight. Humidity can cause the adhesive powder to clump, so consider storing them in a sealed bag with silica gel packets. Avoid folding or creasing the film, as this can damage the print. When ready to use, allow them to acclimate to room temperature before pressing.
Frequently Asked Questions About DTF Transfers
How long do DTF transfers last?
With proper application and care, DTF transfers can last as long as the garment itself. They withstand dozens of washes without fading or cracking if you follow the washing instructions: turn the garment inside out, use cold water, and avoid harsh detergents or bleach.
Can I use DTF transfers on dark colors?
Absolutely. DTF transfers include a white ink layer that makes colors pop on dark fabrics. You don't need to adjust your design; the white base ensures vibrant results.
Do I need a special printer for DTF?
Yes, DTF printing requires a dedicated DTF printer that uses DTF inks and can handle the film. However, you can also buy pre-printed DTF transfers from suppliers if you don't want to invest in a printer.
What's the best way to wash a DTF-printed garment?
Wait at least 24 hours after pressing before washing. Turn the garment inside out, machine wash cold, and tumble dry low or hang dry. Avoid ironing directly on the print; if needed, iron inside out.
Can I stretch DTF transfers?
DTF transfers have some stretchability, but they are not as elastic as the fabric itself. For areas that stretch a lot, like knees or elbows, consider a design that accommodates movement or use a fabric with some give.
Final Thoughts
DTF transfers are a game-changer for custom apparel. They combine the best of digital printing with the durability needed for everyday wear. Whether you're just starting or looking to expand your printing capabilities, DTF is worth exploring. With the right techniques and a bit of practice, you'll be creating stunning, long-lasting garments in no time.